E46 Fanatics Forum banner

2005 325i Touring Build (Pic Heavy)

1 reading
18K views 92 replies 24 participants last post by  bmindt  
#1 ·
Good day ladies and gents. I figured I’d just start putting everything in one space.

A little bit of background. I bought the car about a year ago so these are all the changes that have happened in the last year. I’ll probably post a couple times a week so everyone can see the gradual progression for what I’ve already accomplished.
Image

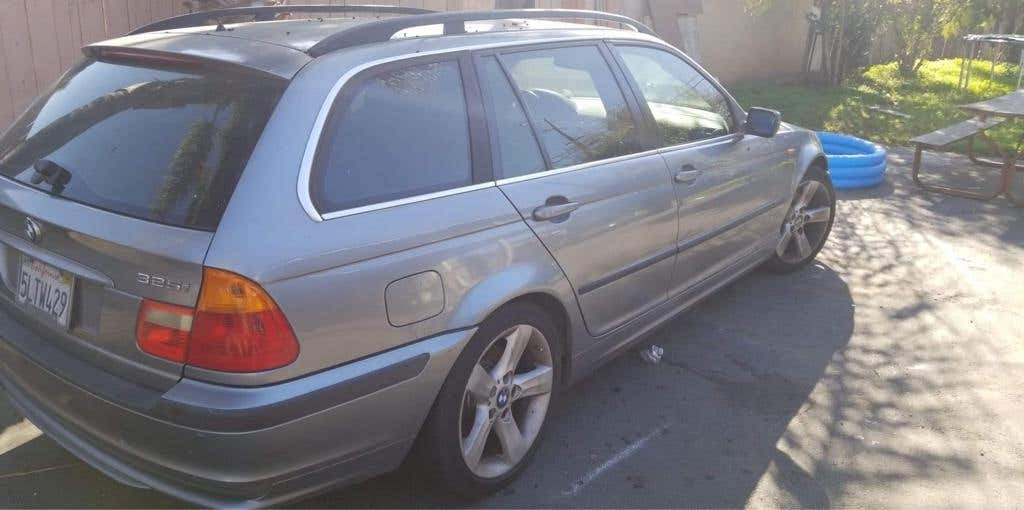
This was the first picture of the wagon I saw when knew I wanted it.
Image

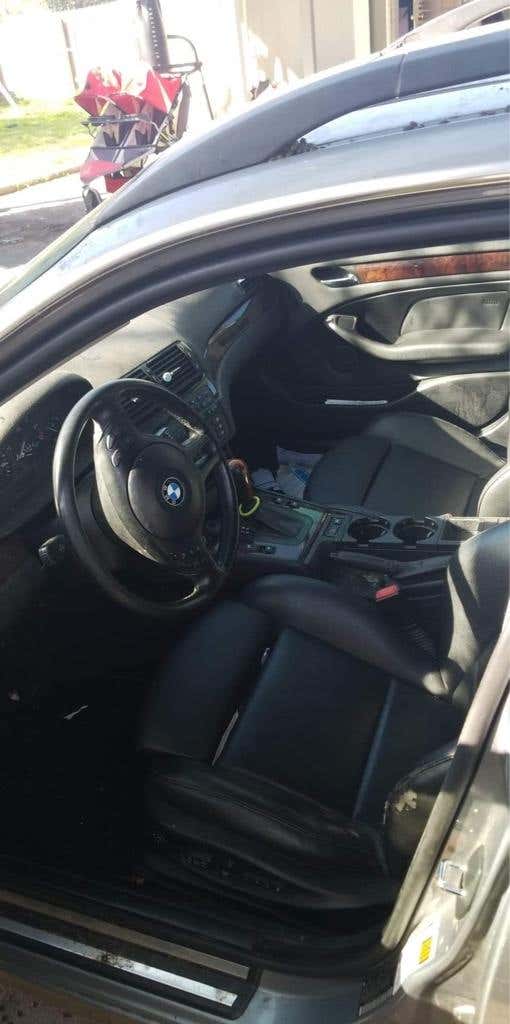
Black interior with the sport package and the seats are in great shape. There is a little wear on the side bolster of the driver seat but nothing else. The white in the space of the leg extension was just a straw wrapper not a tear.
Image

Last thing is that it was missing the passenger side grille and the fan on the fan clutch had exploded and took out the passenger light and dented the hood in hood fashion. Made a deal to purchase it with 171,000 miles for $1250


Sent from my iPhone using Tapatalk
 
#4 ·
Day 2 of keeping this build thread up to date. We obviously had to wash the car and assess the condition.
Image

With as beat up as the paint was the coin op car wash was a good solution to just get off the majority of the gunk.

Image

The car has a complete set of wheels. This wheel was clearly the spare though as the condition was much better then the rest and it came with the factory tire that was as old as the car!

Image

After an eventful day I obviously has to take a cool sunset photo. Over all this day was lots of fun. Keep following for an update tomorrow.


Sent from my iPhone using Tapatalk
 
#7 ·
Today I started looking into the codes for the CEL. At the moment the car has a variety of lights on the dash, CEL, traction control and ABS lights and the air bag light are all illuminated.

These are the codes that came up for the CEL
Image

Image

Image

Image

Image

The rest of them were just random misfires on every cylinder. I reset the codes and only 4 came back. 1. Misfire on cylinder 1, 2. System too lean bank 1. 3. System too lean bank 3 and p16a7 which I didn’t know what it was for.

Started by changed the spark plugs and this is what I found on cylinder 1
Image

Nothing left of the coil pack boot on cylinder 1. Got a new one and the misfire was gone. Still have the lean codes though.

Stay tuned for an update tomorrow.


Sent from my iPhone using Tapatalk
 
#8 ·
Next update. Developed a coolant leak. Thought it was coming from the coolant reservoir but it was actually coming from where the reservoir plugs into. Look at the coronation on the plastic!
Image


I also found a Mtech 2 front bumper in the junkyard and put it. On the wagon! Looks great !
Image

Image


Stay tuned for tomorrow’s update!


Sent from my iPhone using Tapatalk
 
#73 ·
Next update. Developed a coolant leak. Thought it was coming from the coolant reservoir but it was actually coming from where the reservoir plugs into. Look at the coronation on the plastic!
Image


I also found a Mtech 2 front bumper in the junkyard and put it. On the wagon! Looks great !
Image

Image


Stay tuned for tomorrow’s update!


Sent from my iPhone using Tapatalk
Stock 400 wheels-18 in.? Any rub or clearance issues? Great look I must stay.
 
#9 ·
Looks like a great project you have there! Looking forward for the updates.

For the MTech II you'' will need new brackets for the side of the bumper to align properly. Here is the Part #'s

51-11-7-895-415
51-11-7-895-416

I do believe there is someone who 3D prints them, which are cheaper then the OEM ones!
 
#10 ·
Today’s update !

Got a new hood from the junkyard to replace the damage hood that came with the car from the fan clutch exploding.
Image

Old hood off!

Image


New hood on!
Image


It was at this point with a black front bumper, black hood, and chipping clear coat from the roof that I decided that I was going to paint the wagon. And there’s not better place to start then with the hood.

Image

Stay tuned for tomorrow’s update!


Sent from my iPhone using Tapatalk
 
#12 ·
I did the same build! Same color, though I had to transplant a black interior. Yours looks great.

 
#15 ·
Update!!
Since deciding to paint the car I have made some progress.
There was what appeared to be a large dent in the driver door near the handle that was in a spot that couldn’t be take care of by pdr. Fortunately I have a great LKQ near me and found a complete driver door with regulator, glass, locking mechanism for $50!
Image


The door fitment was great and everything works! Quick question though. In my stupidity I trashed the other door before I had the chance to grab the driver mirror off of it. This door is from an older e46 and no longer communicates with the passenger mirror. Did they update the modules?


Sent from my iPhone using Tapatalk
 
#16 ·
Great project and progress so far!

Yes, the mirror memory setup changed along the way. The early cars used a door module for the mirror and seat memory. The later cars moved all of that into the GM5 module and the mirrors and wiring in the door changed. You would need the mirror and the entire door harness from the later door.

Sent from my SM-G970U using Tapatalk
 
#17 ·
Ohhhh so I’d basically need to grab a door harness and mirror from a facelift car and replace it in the current door and then I should have the mirror capabilities again? Very cool that should be a relatively easy task.


Sent from my iPhone using Tapatalk
 
#18 ·
Today’s update!
Started to put a guide coat on pieces of the car to make sanding easier. I’m going to be painting the car in a barn so I’m hoping it comes out ok.
Image

Here’s a few other pictures of the car fully primed!
Image

I also decided I wanted to have gloss black shadow line trim so I made it happen. Next time around I’d like to actually remove the trim itself!
Image

Trim is off the car. Need to sand everything down now and get it ready for it’s first actual stage of primer.
Stay posted for tomorrow’s update.


Sent from my iPhone using Tapatalk
 
#21 ·
The wheels are stock from my f30 m sport. Not sure if their specs specifically. And the reason all of the updates are so frequent is because all the works already been done. Just putting it in a build thread


Sent from my iPhone using Tapatalk
 
#24 ·
Oh boy!... this build is starting fast! Keep it up! I just have to get a bumper painted and Im lagging, meanwhile you sanded down an entire longroof E46 in that time... wait, are you sanding it, or just priming over the old stuff?
 
#27 ·
Today’s update!
More disassembly. I removed the front bumper, rear bumper, door handles, trim and pulled the car in to block sand the car to get it straight

Ended up finishing the block sanding and got the car into primer today!
Image


And another pic after finishing the second coat of primer.
Image

Not a bad way to end the day! Tomorrow will shoot some color onto the car. Super excited !!


Sent from my iPhone using Tapatalk
 
#31 ·
Since the car is already finished, I'm sure we'll find out quickly enough. Personally, I cannot wait to see the finished project.
 
#32 ·
Today’s update. Reading through some concerns about the tail light bucket we did have the inside masked with paper.

Here is some preliminary pics for you guys with color
Image


Image

Image

Image


Looks pretty good after the clear coat. I decided to go with Estoril Blue for the color. Partly because I love the color and that there were only 33 made from bmw in that color. And partly because I have a F30 in the same color and who doesn’t want a matching fleet.
Stay tuned for tomorrow’s update


Sent from my iPhone using Tapatalk
 
#33 ·
Looks pretty good after the clear coat. I decided to go with Estoril Blue for the color. Partly because I love the color and that there were only 33 made from bmw in that color. And partly because I have a F30 in the same color and who doesn’t want a matching fleet.
Stay tuned for tomorrow’s update
Love the project so far. Estoril is such an amazing color on an E46...can't wait to see the end result.
 
#34 ·
Today’s update is reassembly!
Image

Not too bad of a look for a barn paint job.
Image

Emerging from the barn for the first time.
Image

My F30 and wagon. Eventually I will get apex arc8’s for the wagon too.
Image

Some how got my dogs to sit nice in front of the car. Beau (on the right ) with his matching blue harness

Stay tuned for the next update


Sent from my iPhone using Tapatalk