

Hello,
So my gf's sensitive nose has been starting to complain about some odor in the car more and more lately. I, too, have notice some smell coming from the vents especially when I start the car after it was last driven w/ A/C turned on. Reading the Bentley's manual, there's a mention about cleaning evaporator to elimiate odor issues. So i set out and googled some evap cleaner sprays. Now, I'm pretty sure there's better way of doing it, but this is my first attempt, so you can tell me what I'm doing wrong if anything.
Also, I know many have said to use some disinfectant or odor control spray and spray the air inlet while running the fan. But I think that probably only temporary and still doesn't really 'clean' out the junk that has been building up in the evaporator coil... But that's just me. :str8pimpi
To start with:
![Image]()
I ordered two brands, not knowing what's the difference. The middle can is a carb cleaner. Itself is of no use for this project, however the adjustible 'straw' is definitely needed to aim the cleaner in the tiny opening of the final stage resistor opening.
I honestly didn't read the manual throughly, so I thought this would be 1 hr job. Ended up w/ 3 hr. I *think* I could have skipped a buncha steps too, but too late when I realized it because everything is out already.
Overview:
* = MAYBE I could have skipped. Not sure....
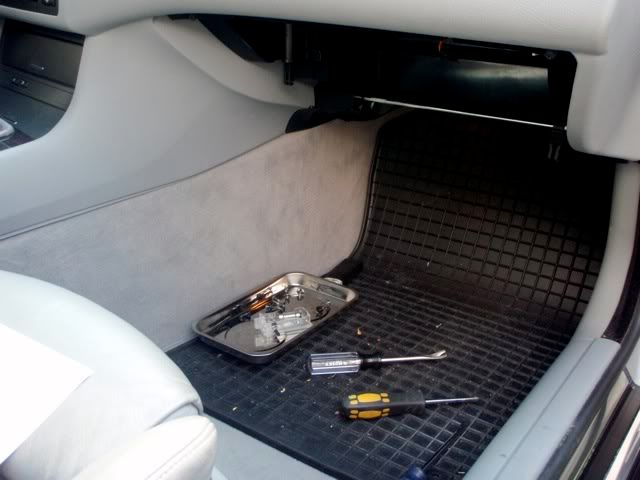
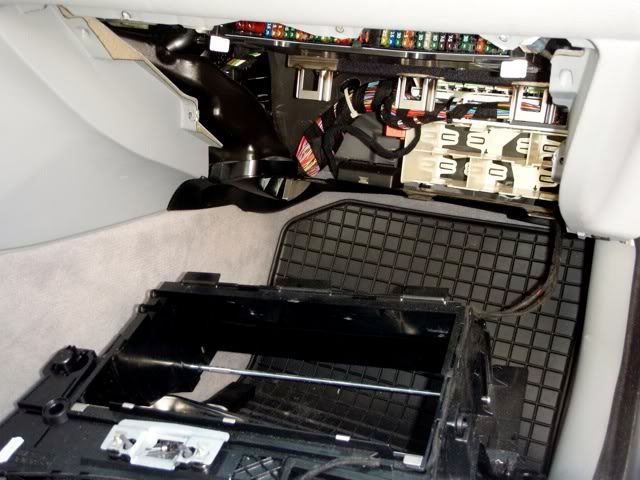
Glove compartment is easy enuf. I removed both the glove compartment + housing. Later I realized I probably can remove the housing w/ the glove compartment still attached. There are a buncha screws you need to remove.
![Image]()
![Image]()
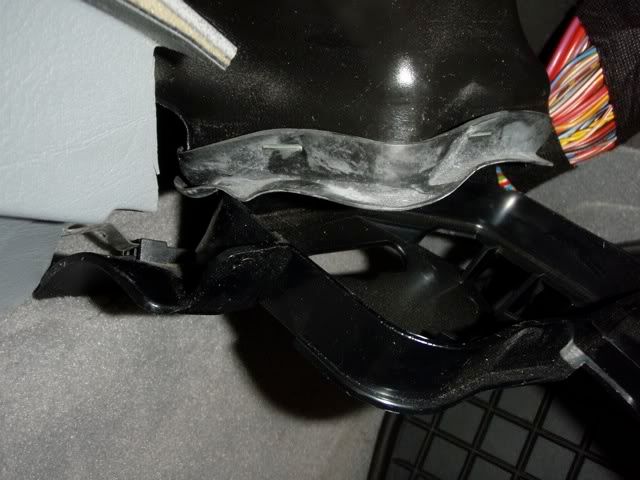
Right foot well pannel.
![Image]()
There's a catch on the left side, you need to slide the pannel toward the front to get it out. A bit of twisitng / bending to get it out. Also see the right footwell duct here.
![Image]()
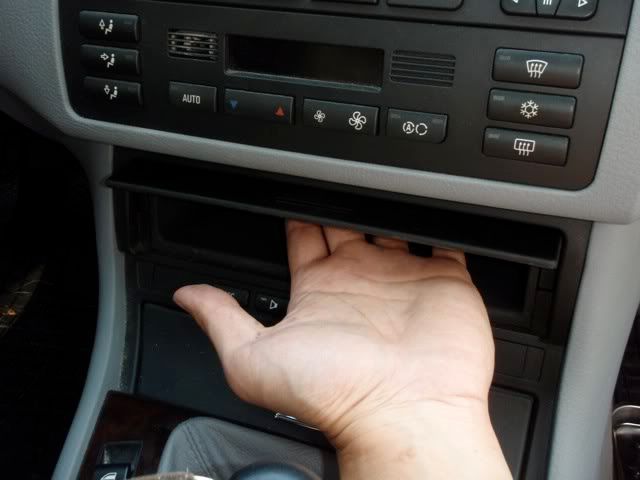
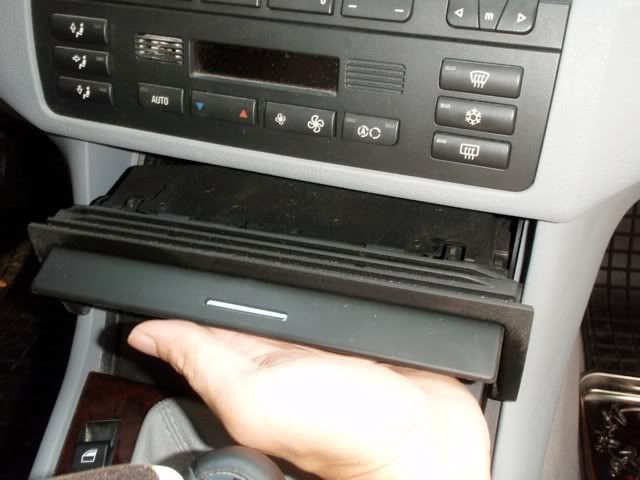
Next I push up on the center storage compartment and pull it backward, it pops right out. Didn't know it was this easy!
![Image]()
![Image]()
Remove the shift knob, shift boot, two screws and disconnect the switches and the shifter trim piece came out. I also removed the foam underneath. Four more screws and the ashtray carrier can be removed
![Image]()
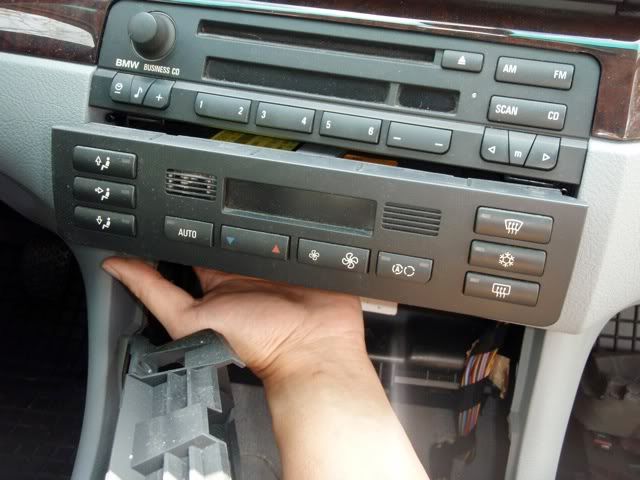
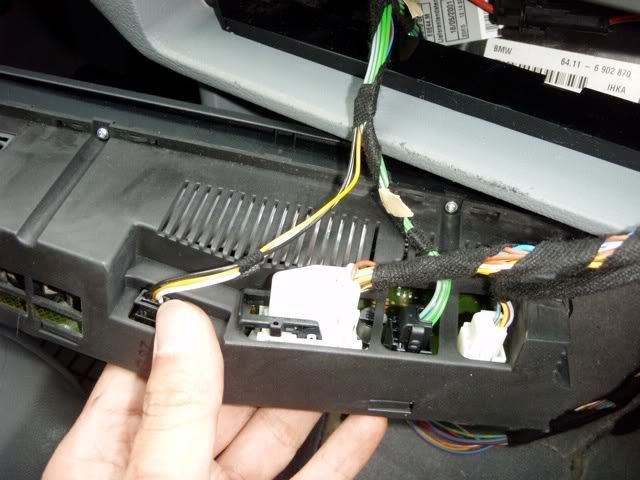
Push from the back of the IHAK control pannel, it will simply pops out. Disconnect it.
![Image]()
![Image]()
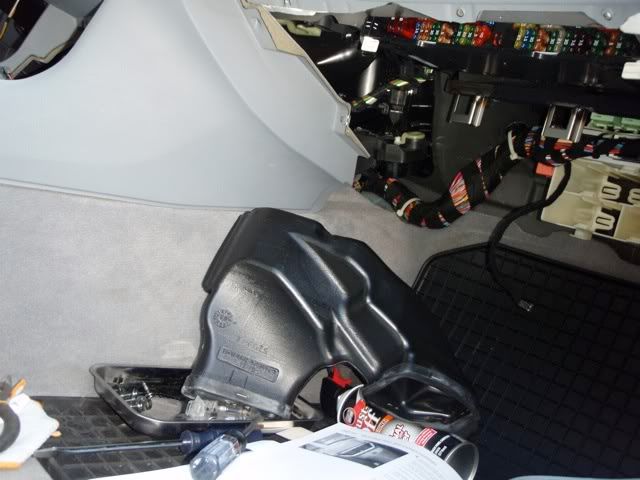
I couldn't get a usable pic, but you do all these *just* to get to release a locking clip of the right foot well air duct. Honestly it's a lot of work to get this stupid thing out. Not knowing how ti connects, it took me 30 min or so just to figured out how to get it out. I have to pull open a bit the right pannel of the center console. Here's the stupid duct:
![Image]()
2 torx screws and the air distribution motor comes out. (dont' forget to unhook the top linkage):
![Image]()
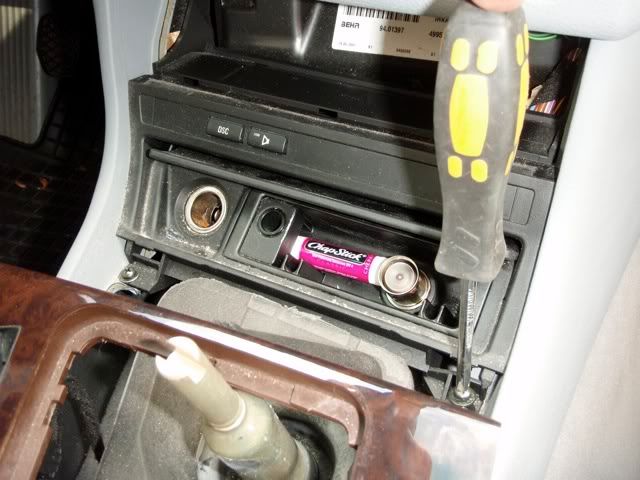
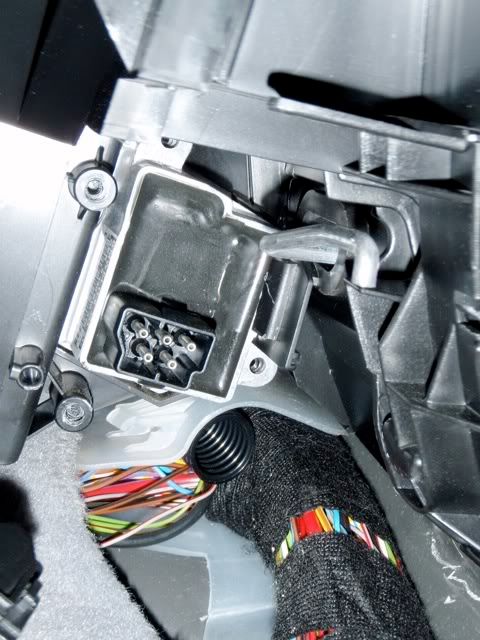
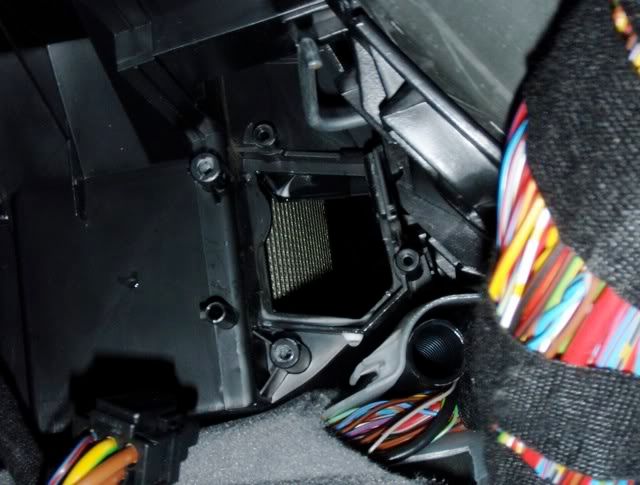
Finally! The final stage resistor. Interestingly mine is held in place with only a plastic clip.
![Image]()
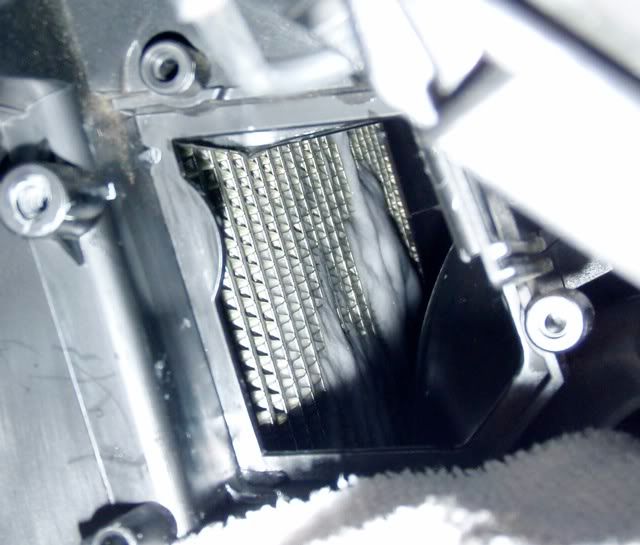
Using flash light and some ungodly body position, you can peek to see the evaporator coil.
![Image]()
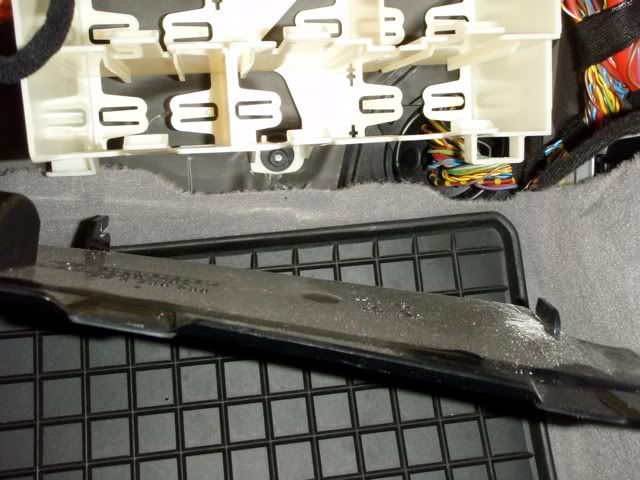
Doing the BEST I could, using the spray with the "straw", I tried to cover as much of the evaporator coil as possible w/ the foaming solution. I'm pretty sure I can't get to the entire thing. There maybe some professional equipment or some smart person on the forum here that can create soemthing to do this. Let me know. This is a REAL PAIN to get to. Here's a pic of the foaming agent draining out:
![Image]()
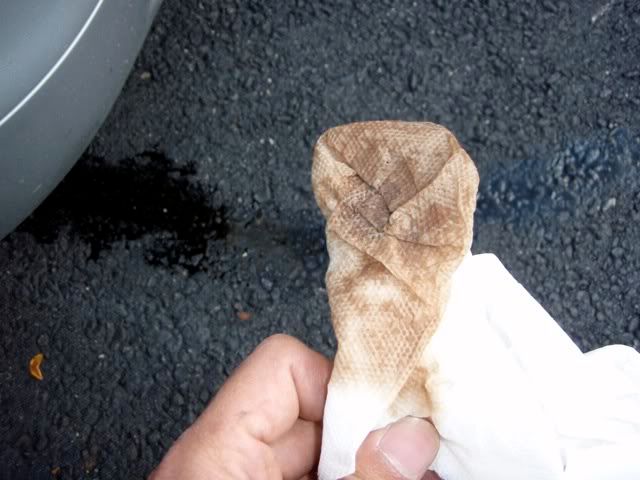
If there's any doubt on amount of yucky stuff that has accumulated over the years, look at the liquid that drained out of the A/C drain hole under the car:
![Image]()
I used up pretty much one entire can and part of another. Just to make sure as it took me so long to get to it, I want to clean as much as I could. I foam it and let it drain I think 3-4 times.
And the famous words: "Install is reverse of removal".
Tonight, the drive was definitely odor-free. There's a hint of lemon scent right now that's from the evap cleaner. It probably will go away in a few days. So far it seems pretty affective. My gf's ultra sensitive nose can't seem to detect any smell now.
Hope this info can help some of you if you are looking to do this also. I'm sure there's better / easier way to do so. Also, maybe some one can confirm, could I have skipped all the middle steps and leave the right footwell duct intact to gain access to the final stage resistor?
So my gf's sensitive nose has been starting to complain about some odor in the car more and more lately. I, too, have notice some smell coming from the vents especially when I start the car after it was last driven w/ A/C turned on. Reading the Bentley's manual, there's a mention about cleaning evaporator to elimiate odor issues. So i set out and googled some evap cleaner sprays. Now, I'm pretty sure there's better way of doing it, but this is my first attempt, so you can tell me what I'm doing wrong if anything.
Also, I know many have said to use some disinfectant or odor control spray and spray the air inlet while running the fan. But I think that probably only temporary and still doesn't really 'clean' out the junk that has been building up in the evaporator coil... But that's just me. :str8pimpi
To start with:
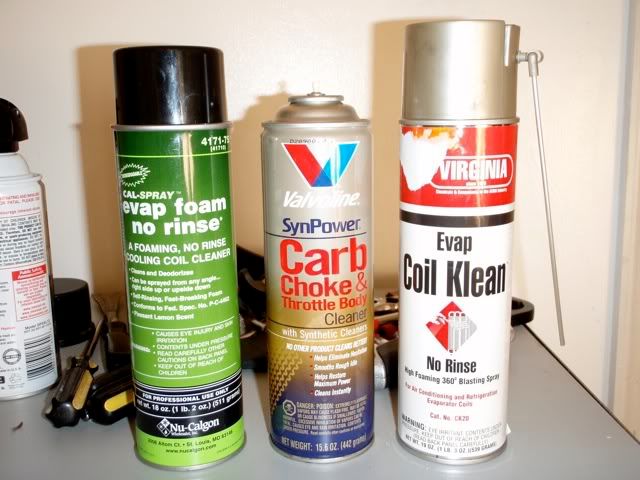
I ordered two brands, not knowing what's the difference. The middle can is a carb cleaner. Itself is of no use for this project, however the adjustible 'straw' is definitely needed to aim the cleaner in the tiny opening of the final stage resistor opening.
I honestly didn't read the manual throughly, so I thought this would be 1 hr job. Ended up w/ 3 hr. I *think* I could have skipped a buncha steps too, but too late when I realized it because everything is out already.
Overview:
- Remove glove compartment
- Remove center storage compartment*
- Remove shifter knob + trims*
- Remove center trim with ash tray*
- Remove IHKA control module*
- Remove right foot well duct*
- Remove final stage resistor
- Spray cleaner, wait 5 min or so to drain, turn on A/C to dry.
* = MAYBE I could have skipped. Not sure....
Glove compartment is easy enuf. I removed both the glove compartment + housing. Later I realized I probably can remove the housing w/ the glove compartment still attached. There are a buncha screws you need to remove.
Right foot well pannel.
There's a catch on the left side, you need to slide the pannel toward the front to get it out. A bit of twisitng / bending to get it out. Also see the right footwell duct here.
Next I push up on the center storage compartment and pull it backward, it pops right out. Didn't know it was this easy!
Remove the shift knob, shift boot, two screws and disconnect the switches and the shifter trim piece came out. I also removed the foam underneath. Four more screws and the ashtray carrier can be removed
Push from the back of the IHAK control pannel, it will simply pops out. Disconnect it.
I couldn't get a usable pic, but you do all these *just* to get to release a locking clip of the right foot well air duct. Honestly it's a lot of work to get this stupid thing out. Not knowing how ti connects, it took me 30 min or so just to figured out how to get it out. I have to pull open a bit the right pannel of the center console. Here's the stupid duct:
2 torx screws and the air distribution motor comes out. (dont' forget to unhook the top linkage):

Finally! The final stage resistor. Interestingly mine is held in place with only a plastic clip.
Using flash light and some ungodly body position, you can peek to see the evaporator coil.
Doing the BEST I could, using the spray with the "straw", I tried to cover as much of the evaporator coil as possible w/ the foaming solution. I'm pretty sure I can't get to the entire thing. There maybe some professional equipment or some smart person on the forum here that can create soemthing to do this. Let me know. This is a REAL PAIN to get to. Here's a pic of the foaming agent draining out:
If there's any doubt on amount of yucky stuff that has accumulated over the years, look at the liquid that drained out of the A/C drain hole under the car:
I used up pretty much one entire can and part of another. Just to make sure as it took me so long to get to it, I want to clean as much as I could. I foam it and let it drain I think 3-4 times.
And the famous words: "Install is reverse of removal".
Tonight, the drive was definitely odor-free. There's a hint of lemon scent right now that's from the evap cleaner. It probably will go away in a few days. So far it seems pretty affective. My gf's ultra sensitive nose can't seem to detect any smell now.
Hope this info can help some of you if you are looking to do this also. I'm sure there's better / easier way to do so. Also, maybe some one can confirm, could I have skipped all the middle steps and leave the right footwell duct intact to gain access to the final stage resistor?


