Due to a series of events I now have 3 more E46s in addition to my 03 330cic:
2002 325ci convertible - black with two tone tan interior
2002 330ci convertible - black on black
2003 325i touring - Stahlblau with grey
The first was running but interior soaking wet and rear seat covered in mildew - 125k miles. This is for the daughter of a friend.
Second one has a perfect body and near-perfect interior. Had 12" of water in the trunk and didn't run. Fixed the roof tray drain and did a complete restore of the intake, brakes and electrical ($2,500 parts) now it runs absolutely perfect with near zero LTFT no codes. My buddy gets this one once we get title.
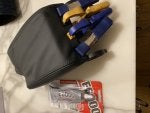
The third is my baby and the subject of this thread. Near-perfect body.
![Image]()
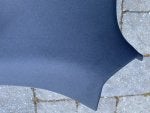
A blocked sunroof drain led to saturation of the carpet and a lot of "growth." Tore the entire interior out - I hate grey anyway. Btw if anyone wants grey parts for a touring, I'm your guy! Carpet went into the garbage, and everything else was washed with light bleach.
![Image]()
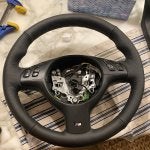
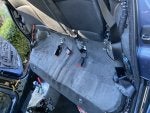
Picked up most of a black interior at a wrecker - they started pulling the trim and broke every piece! I told them to stop and did it myself, including the carpet. Took about 3 hours. But I got most of what I need, and now only need to source two sport heated seats in black and a console.
2002 325ci convertible - black with two tone tan interior
2002 330ci convertible - black on black
2003 325i touring - Stahlblau with grey
The first was running but interior soaking wet and rear seat covered in mildew - 125k miles. This is for the daughter of a friend.
Second one has a perfect body and near-perfect interior. Had 12" of water in the trunk and didn't run. Fixed the roof tray drain and did a complete restore of the intake, brakes and electrical ($2,500 parts) now it runs absolutely perfect with near zero LTFT no codes. My buddy gets this one once we get title.
The third is my baby and the subject of this thread. Near-perfect body.
A blocked sunroof drain led to saturation of the carpet and a lot of "growth." Tore the entire interior out - I hate grey anyway. Btw if anyone wants grey parts for a touring, I'm your guy! Carpet went into the garbage, and everything else was washed with light bleach.
Picked up most of a black interior at a wrecker - they started pulling the trim and broke every piece! I told them to stop and did it myself, including the carpet. Took about 3 hours. But I got most of what I need, and now only need to source two sport heated seats in black and a console.


")