

I've been wanting a dashcam for some time now and I finally bought one. I picked up an A118 B40-C camera for under $100. This guide is not specific to this camera, nor is it even specific to cameras. The most useful part of this guide is simply the switched power that I pull from the Homelink connector.
I like clean installs and I HATE damaging factory wiring. So, how do you avoid this? You use a factory connector. All E46s come prewired for Homelink so they all have a little white three pin connector under the sunroof controls. It couldn't be easier.
Required Tools:
Butter knife (or other thin prying tool)
Soldering Iron
Solder
Wire Strippers (I love these Irwin Strippers)
What I bought:
Dashcam + SD Card + DC to DC Converter
![Image]()
Don't forget some heatshrink tubing to cover the splice later and some small zip ties for wire management.
Now you have two options for the connector
Option 1 (performed here):
Wire
20 AWG automotive wire (thin insulation is best)
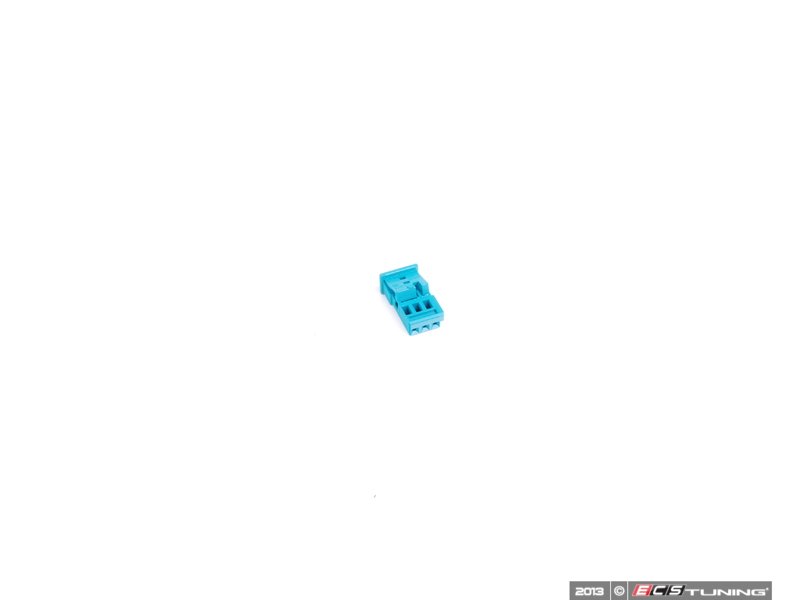
Connector (x1):
Tyco Part number 2-968700-1
Terminals (x2 needed, buy more for mistakes):
Tyco Part number 963716-2
![Image]()
Option 1 requires access to a Tyco Crimp tool (below), which most people are not going to have. I recommend option 2!
![Image]()
Option 2:
Connector + Wires from BMW
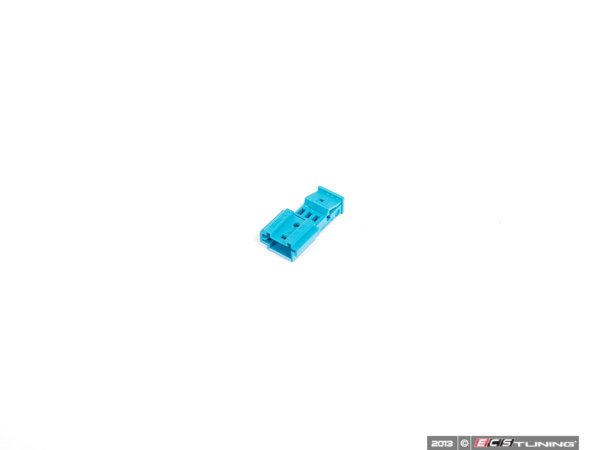
Connector (x1):
BMW Part Number 61136931929
![Image]()
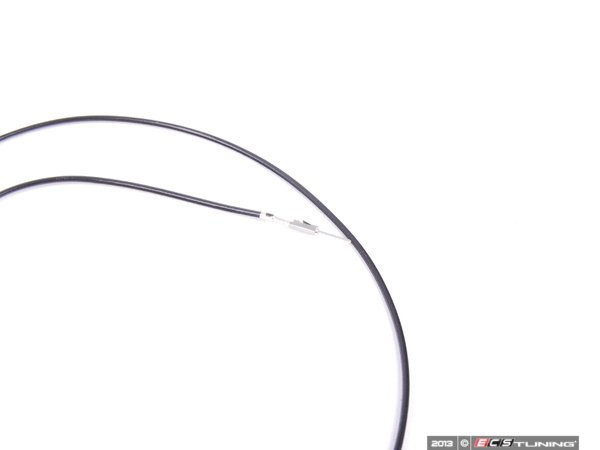
Terminal + Wire (x2):
BMW Part Number: 61130005198
![Image]()
Connector Assembly
After purchasing your components, the first step is to assemble your connector. If you chose option 1, crimp your terminals onto 20 AWG (0.5 mm^2) wire. Strip length is 3/16". If you chose option 2, simply insert one terminal into the Pin 1 (power) hole and the other into the Pin 3 (ground) hole.
![Image]()
![Image]()
Then close the TPA clasp.
![Image]()
Power Adapter Splicing
You have a couple options to splice the connector that you just made to your DC to DC converter. You can solder (with a few methods) or crimp. I chose to solder as it gives the cleanest and smoothest connection.
Specifically I chose the mesh solder splice. It only works with stranded wires. Strip about 3/4"-1" of wire from each wire to be connected. Put your heatshrink tubing over the wires before joining them.
Next push the wires to be spliced into eachother. You need to wiggle them a little and some strands will bend.
![Image]()
Now give them each a slight twist. This is to keep the strands close in together for a smooth joint.
![Image]()
Now apply your solder.
![Image]()
And then put your shrink tubing over the joint. This is your result:
![Image]()
For this specific application, this is now what you have:
![Image]()
Car Installation:
Remove the cover in the roof panel using the butter knife.
![Image]()
This exposes the Homelink connector. Pull it out of the homelink device. This will disable homelink of course. Who uses this anyway? If you're really smart, you can figure out how to create a Y-connector to power the dashcam (or radar detector) and the Homelink at the same time (parallel connection).
Also remove the light unit from the spot in front of the homelink trim piece. It's easy to remove from the top with your fingers. Simply push down on it, and it pops you.
If you do not have Homelink, then you will have to go fishing for this connector up next to the sunroof motor. It is white. There is a black one up there that will not work. Find the white connector.
![Image]()
Plug in the connector you just built:
Partial insertion pictured. As you can see, the Green/Blue wire is power (Pin 1). The Brown wire is ground (Pin 3).
![Image]()
Now fish the USB end of the adapter to the windshield
![Image]()
You're basically done. Set up your dashcam in the position that you prefer most. Then do some wire management and stuff the adapter up into the roof.
![Image]()
My wires didn't fit well here, and I moved them to clear the lights, but this shows the idea.
Finished mounting:
![Image]()
The other wire is the GPS antenna that I put on the other side of the mirror.
Results:
![Image]()
People with black interiors will have little problem, but my biege dash really ruins the picture. This is what I've purchased to fix the glare. I'll post back once it's installed.
![Image]()
I forgot to edit this when I got the polarized filter. It doesn't really do anything except ruin night performance. It slightly reduced the dash reflection, but really there's nothing I can do about it other than paint the dash black.
PARTS FOR Y ADAPTER
If you want to make a Y adapter to power both the homelink and another device, then you need the car-side connector and terminals. I have not tested this, but theoretically it should work since you're just tapping 12VDC in parallel.
Connector: 61138377072
Terminal Pigtails: 61130005197
![Image]()
A more future proof suggestion from another owner:
I like clean installs and I HATE damaging factory wiring. So, how do you avoid this? You use a factory connector. All E46s come prewired for Homelink so they all have a little white three pin connector under the sunroof controls. It couldn't be easier.
Required Tools:
Butter knife (or other thin prying tool)
Soldering Iron
Solder
Wire Strippers (I love these Irwin Strippers)
What I bought:
Dashcam + SD Card + DC to DC Converter

Don't forget some heatshrink tubing to cover the splice later and some small zip ties for wire management.
Now you have two options for the connector
Option 1 (performed here):
Wire
20 AWG automotive wire (thin insulation is best)
Connector (x1):
Tyco Part number 2-968700-1
Terminals (x2 needed, buy more for mistakes):
Tyco Part number 963716-2

Option 1 requires access to a Tyco Crimp tool (below), which most people are not going to have. I recommend option 2!

Option 2:
Connector + Wires from BMW
Connector (x1):
BMW Part Number 61136931929
Terminal + Wire (x2):
BMW Part Number: 61130005198
Connector Assembly
After purchasing your components, the first step is to assemble your connector. If you chose option 1, crimp your terminals onto 20 AWG (0.5 mm^2) wire. Strip length is 3/16". If you chose option 2, simply insert one terminal into the Pin 1 (power) hole and the other into the Pin 3 (ground) hole.


Then close the TPA clasp.

Power Adapter Splicing
You have a couple options to splice the connector that you just made to your DC to DC converter. You can solder (with a few methods) or crimp. I chose to solder as it gives the cleanest and smoothest connection.
Specifically I chose the mesh solder splice. It only works with stranded wires. Strip about 3/4"-1" of wire from each wire to be connected. Put your heatshrink tubing over the wires before joining them.
Next push the wires to be spliced into eachother. You need to wiggle them a little and some strands will bend.

Now give them each a slight twist. This is to keep the strands close in together for a smooth joint.

Now apply your solder.

And then put your shrink tubing over the joint. This is your result:

For this specific application, this is now what you have:

Car Installation:
Remove the cover in the roof panel using the butter knife.

This exposes the Homelink connector. Pull it out of the homelink device. This will disable homelink of course. Who uses this anyway? If you're really smart, you can figure out how to create a Y-connector to power the dashcam (or radar detector) and the Homelink at the same time (parallel connection).
Also remove the light unit from the spot in front of the homelink trim piece. It's easy to remove from the top with your fingers. Simply push down on it, and it pops you.
If you do not have Homelink, then you will have to go fishing for this connector up next to the sunroof motor. It is white. There is a black one up there that will not work. Find the white connector.

Plug in the connector you just built:
Partial insertion pictured. As you can see, the Green/Blue wire is power (Pin 1). The Brown wire is ground (Pin 3).

Now fish the USB end of the adapter to the windshield

You're basically done. Set up your dashcam in the position that you prefer most. Then do some wire management and stuff the adapter up into the roof.

My wires didn't fit well here, and I moved them to clear the lights, but this shows the idea.
Finished mounting:

The other wire is the GPS antenna that I put on the other side of the mirror.
Results:

People with black interiors will have little problem, but my biege dash really ruins the picture. This is what I've purchased to fix the glare. I'll post back once it's installed.

I forgot to edit this when I got the polarized filter. It doesn't really do anything except ruin night performance. It slightly reduced the dash reflection, but really there's nothing I can do about it other than paint the dash black.
PARTS FOR Y ADAPTER
If you want to make a Y adapter to power both the homelink and another device, then you need the car-side connector and terminals. I have not tested this, but theoretically it should work since you're just tapping 12VDC in parallel.
Connector: 61138377072
Terminal Pigtails: 61130005197
A more future proof suggestion from another owner:


