

Hi all. Not sure if this is in the right place seems correct as I am also fitting Bluetooth Handsfree
and iPod controller so makes sense in an A/V section.
Okay. I needed to do this job and found little actual detailed knowledge on how to do it, just people
saying it's easy etc but no step-by-step guide.
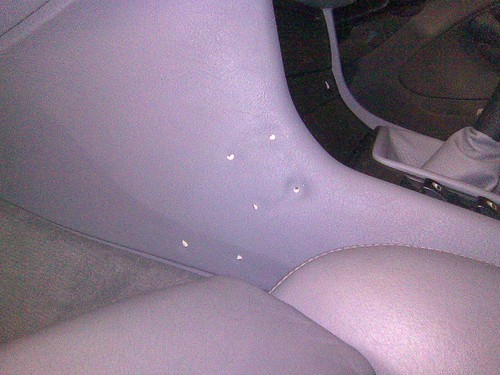
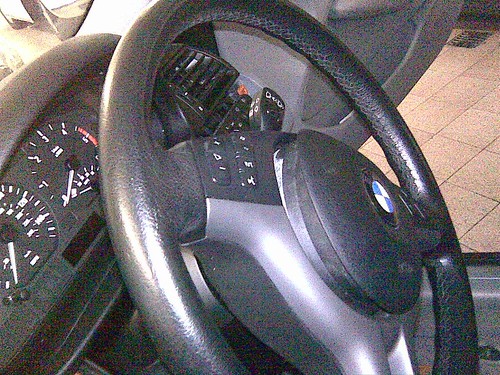
The main reason I decided to do it is because the previous owner of my 320d Touring decided to
have a phone holder drilled into his (now mine) nice expensive console. I couldn't live with it,
looks too ghetto. Bad news is the console is part of the entire dashboard, unlike E30/E36 which
annoyed me no end. Good news was a new dash (like new) was only £45 off eBay. I also had to
sort out the trim on my steering wheel and fit other bits so doing the whole dash wasn't much more work.
![Image]()
+++++++++++
Start
TIP: Ensure you remember which screws/nuts came from where. I either screw them back into the
removed part or tape them to the hole they came out of. Sounds silly but I've always found that screws
often won't even go back into the hole they came out of. Save yourself the headache - be organized on this front.
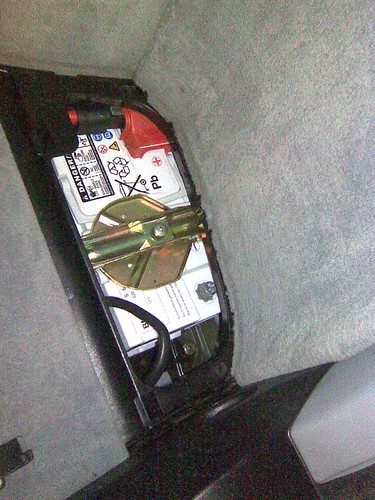
First thing to do is remove the Neg terminal at the Battery, This will stop airbags (and you'll be handling them) firing
and also lower the risk of getting any airbag warning lights bugging you on your display.
![Image]()
Now remove seats, You don't have to remove the seat-belts, just unbolt the 4 fasteners in each corner and put
them outside the car. TAKE CARE not to scratch your interior or the paint as the seat rails are sharp and the seats
are heavy - do it slowly and carefully.
You can do it with seats in place but it's a bad idea - much more room to remove stuff and keep tools close etc.
Takes 5mins. Don't forget to disconnect the sensor cable underneath before you remove.
![Image]()
Here is another pic to remind you to disconnect your battery.
![Image]()
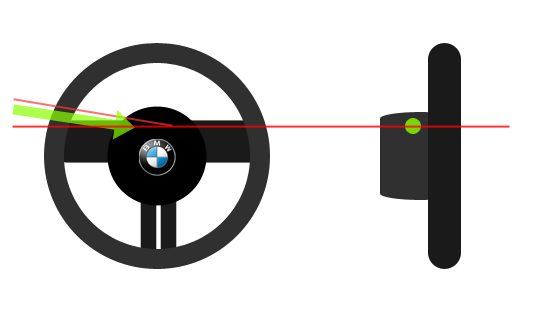
Now remove the steering wheel. Behind the wheel on the back of the two horizontal spokes are two small holes.
Using a small flat head screwdriver, carefully push into the hole roughly parallel to the spoke. If anything, approach
about 10d from above. You should meet resistance in the form of a spring. Push into it and at the same time pull
gently at the airbag. If you don't feel the springs tension against the screwdriver you are not entering at the correct angle.
Repeat for the other side. The first time you do this it may take a while, the second time will take approx 10 seconds.
Release Hole Angle
![Image]()
Actual location
![Image]()
One side of airbag released...
![Image]()
Airbag Off
![Image]()
Remove the airbag wiring and the multifunction loom if you have this. Disconnect it from the stalk boss NOT the wheel.
Put the airbag somewhere safe out the way. Remove the steering wheel centre bolt - it's fairly tight. Remember the
correct Torque setting when replacing.
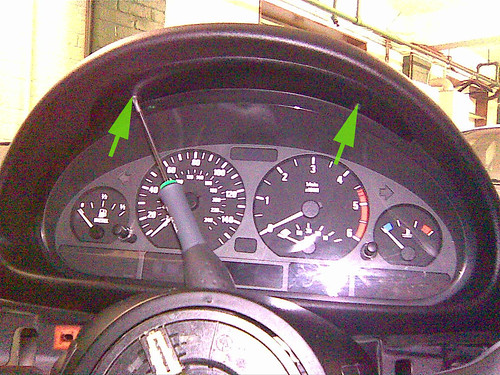
Whilst you're there, remove the speedo clocks. 2 x Torx screws at the top in front of the display.
![Image]()
Tip the top out first then it comes out easily
![Image]()
Now remove the stalks. Remove 2 x plastic rivets underneath the steering cowling and 1 x plastic phillips screw on top.
Now remove 4 x Torx screws in each corner of the stalk hub and remove the stalk assembly. Disconnect cabling.
![Image]()
The steering column trim (in the footwell) will also have to be disconnected from the dash but you don't need to remove
it or disconnect any of the lights or warning gong. 2 x Screws underneath, 1 x plastic rivet where it joins the centre console
and a rubber plug (Clutch Stop) behind the clutch pedal must all be removed. Then just let it rest on the floor.
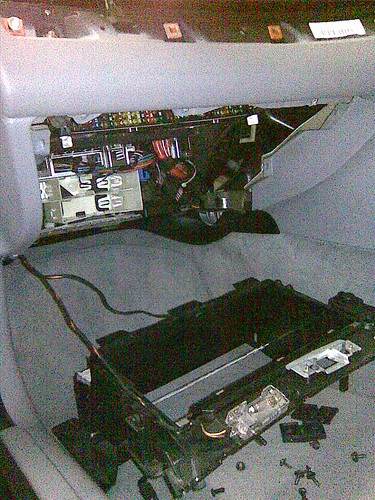
Now for the glovebox. Very easy. Open glovebox. Locate 2 x Phillips screws facing you either side of the glovebox hanging supports,
1 underneath on the door-side at the very edge and finally 3 in a row facing you at the top edge. Once removed, pull toward you
whilst rotating down. Disconnect light and torch recharge cables.
Here is another pic to remind you to disconnect your battery though by now it's too late...
![Image]()
I removed the glovebox door from the actual casing as I was fitting some accessories in there but it all comes out as one unit.
![Image]()
To get the door lower for more space, prize the locking pins off the hanging straps.
![Image]()
Short Detour
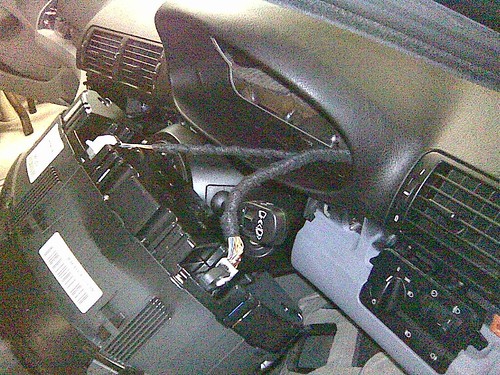
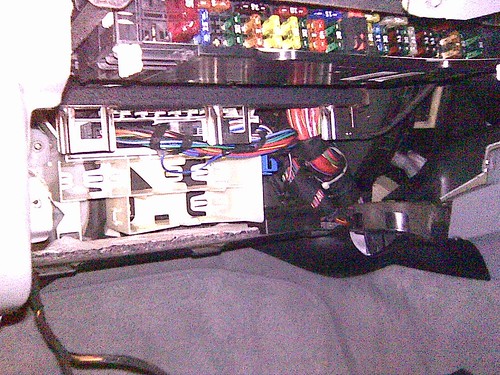
If you are going to install iPod controllers or non-OEM telephony etc you'd put it here, in the white recesses behind the glovebox.
There is easy access to the radio and 12V / earth feeds also.
![Image]()
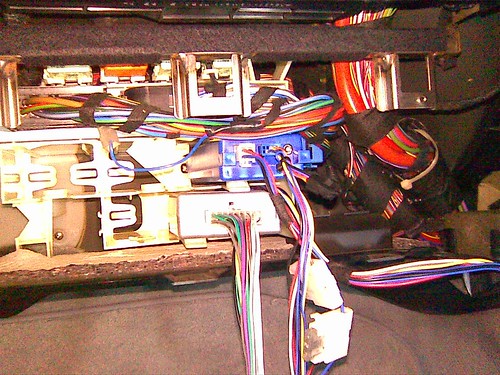
I installed my GromAudio iPod controller here and a Parrot Evolution Bluetooth kit with Steering wheel adapter. It's very good value
over OEM as it has superior sound quality (Award winning DSP) and is compatible with more handsets. The GromAudio also let's me
control ipOd from my steering wheel as if it were the CD-Changer. I like these two set-ups as I don't need to see either of them and
nobody knows the car has a juicy iPod in the glovebox.
Parrot Bluetooth and GromAudio iPod Interface
![Image]()
Fits like a Glove
![Image]()
Now the centre trim strips running along the dash. These hide the main bolts holding the dash onto the frame support behind.
Using a plastic spatula or trim tool, gently pry them off. Whatever you use, make sure it's blunt and won't scratch your trim.
![Image]()
For passenger side, start with the longest one. Pry the corner away from the dash. They are simply press fit into plastic studs.
Work your way down and pull off. Do the same all 3 pieces.
Now remove all screws and nuts behind these trims, including the screws holding the vents at either end of the dash and the
headlight switch panel. The radio is also held in this way, remove 2 x screws either side there and slide it out. The vents just
pop out so give them a tug. Disconnect all radio wiring and the headlight switch connector too.
Centre Trims.
![Image]()
![Image]()
Passenger Side
![Image]()
Drivers Side
![Image]()
Radio out.
![Image]()
Radio connector - slide handle up then pull plug off - isn't obvious the first time.
![Image]()
Now the passenger airbag. Just pry up the air bag cover, it's only held in by thing tabs and ridges. Just use your hands or a
plastic spatula etc. Inside is the airbag. In theory you can leave this in place as it's not attached to the dash but the cover needs
to come away from the dash it is attached to a bracket underneath the airbag so remove the large nuts either side of the airbag,
lift it out (disconnect if you want) and then remove the airbag cover canvas straps.
![Image]()
![Image]()
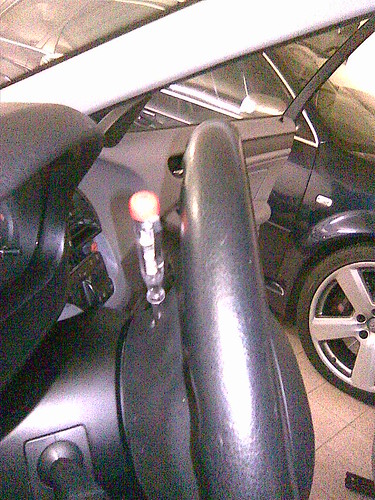
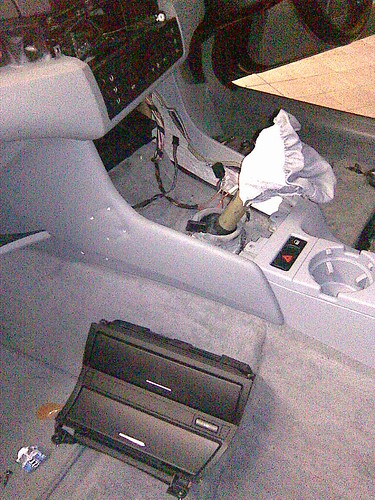
Handbrake console also needs to come off but not totally - you only need access to remove the gearshift surround. So pry off
the gearshift gaiter. And unscrew 4 x screws in each corner.
![Image]()
I was replacing my surround trim at the same time - this is generally a good time to sort any electrical / trim issues you have
as it's all coming off.
![Image]()
Now remove the 2 x screws holding the ashtray bracket in. There will also be 2 cables for cigarette lighter and ASC/DSC switch.
Just comes right out.
![Image]()
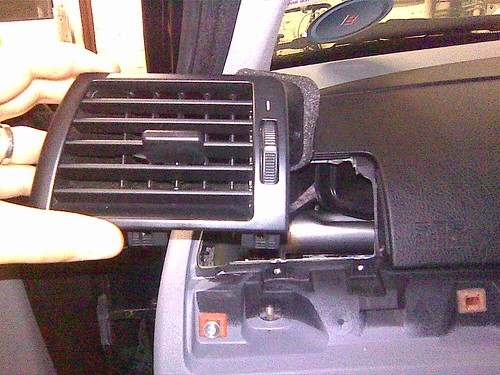
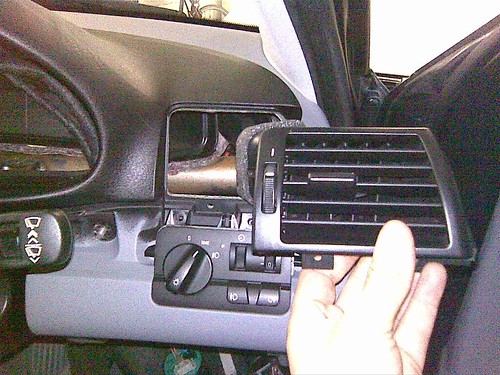
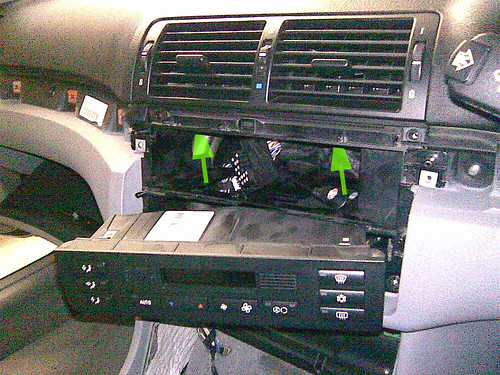
I've left the center vents and A/C bracket for last as it's the the only bit that will trip you up if you haven't done it before.
The Climate unit just pops out - get your hand behind it and push it toward you. Disconnect the cables.
Now, looking at the centre vents straight on, there are two click tabs you cannot see that must be pushed up at the front base
of the vents. Then you just reach behind it and push it out. Ensure you have heard the click release of those tabs otherwise
it won't budge. If you're sure, give it a good push - it will come - don't pull it from the vent slats - they'll break. When it comes
out there is an actuator cable attached for the cold/warm mixer. Disconnect this and remove the locking tab. Do not lose it.
Press upwards inside here (on the vent base not the dash) till you hear the click
![Image]()
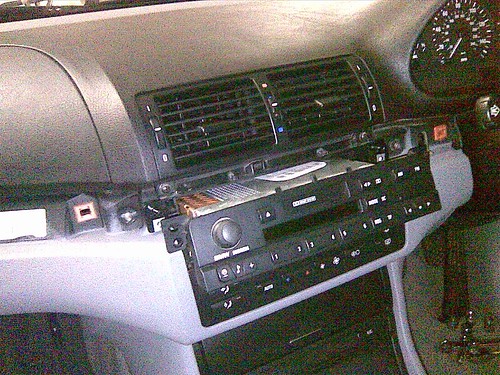
Also, remove the radio / climate housing bracket now also.
Now remove the A-pillar trim. Very easy. If you don't have airbags here just grab them and pull them up and out. If you have
airbags here it's the same except you pry off the centre strip facing the windscreen and remove 3 x Torx screws. They are long
so choose your tool well - not much space against the glass.
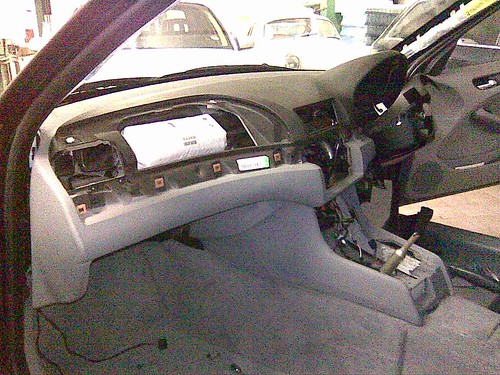
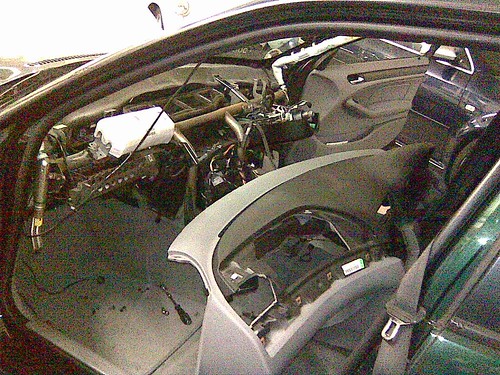
All the stuff out.
![Image]()
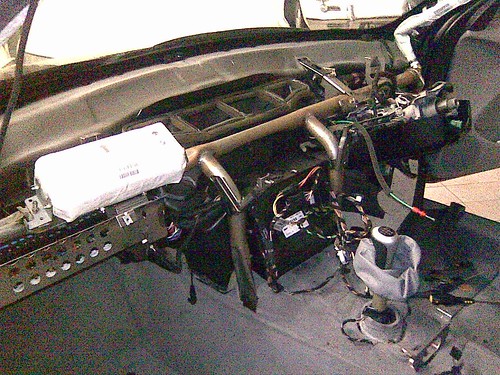
Once these are out you can remove the dash. Helps to have 2 people here but you can do one end at a time.
Stripped and ready for removal.
![Image]()
![Image]()
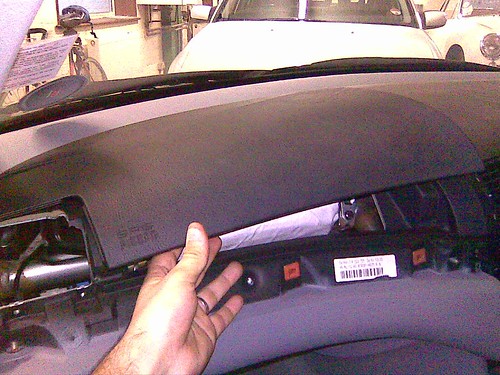
Don't forget to unplug this connector before you take the dash out - even more importantly, don't forget to plug it in FIRST
when replacing.
![Image]()
And it's off!
![Image]()
And the bit I've been waiting all day to say - installation is reverse of removal!
Old dash and new dash.
![Image]()
When installing, if screws don't fit smoothly or trim is misaligned or the glovebox doesn't close properly it means the dash is not 100%
aligned so check that it is before you put it all back together. You may also get weak air flow from your vents if it's not set properly.
and iPod controller so makes sense in an A/V section.
Okay. I needed to do this job and found little actual detailed knowledge on how to do it, just people
saying it's easy etc but no step-by-step guide.
The main reason I decided to do it is because the previous owner of my 320d Touring decided to
have a phone holder drilled into his (now mine) nice expensive console. I couldn't live with it,
looks too ghetto. Bad news is the console is part of the entire dashboard, unlike E30/E36 which
annoyed me no end. Good news was a new dash (like new) was only £45 off eBay. I also had to
sort out the trim on my steering wheel and fit other bits so doing the whole dash wasn't much more work.
+++++++++++
Start
TIP: Ensure you remember which screws/nuts came from where. I either screw them back into the
removed part or tape them to the hole they came out of. Sounds silly but I've always found that screws
often won't even go back into the hole they came out of. Save yourself the headache - be organized on this front.
First thing to do is remove the Neg terminal at the Battery, This will stop airbags (and you'll be handling them) firing
and also lower the risk of getting any airbag warning lights bugging you on your display.
Now remove seats, You don't have to remove the seat-belts, just unbolt the 4 fasteners in each corner and put
them outside the car. TAKE CARE not to scratch your interior or the paint as the seat rails are sharp and the seats
are heavy - do it slowly and carefully.
You can do it with seats in place but it's a bad idea - much more room to remove stuff and keep tools close etc.
Takes 5mins. Don't forget to disconnect the sensor cable underneath before you remove.

Here is another pic to remind you to disconnect your battery.

Now remove the steering wheel. Behind the wheel on the back of the two horizontal spokes are two small holes.
Using a small flat head screwdriver, carefully push into the hole roughly parallel to the spoke. If anything, approach
about 10d from above. You should meet resistance in the form of a spring. Push into it and at the same time pull
gently at the airbag. If you don't feel the springs tension against the screwdriver you are not entering at the correct angle.
Repeat for the other side. The first time you do this it may take a while, the second time will take approx 10 seconds.
Release Hole Angle
Actual location
One side of airbag released...
Airbag Off

Remove the airbag wiring and the multifunction loom if you have this. Disconnect it from the stalk boss NOT the wheel.
Put the airbag somewhere safe out the way. Remove the steering wheel centre bolt - it's fairly tight. Remember the
correct Torque setting when replacing.
Whilst you're there, remove the speedo clocks. 2 x Torx screws at the top in front of the display.
Tip the top out first then it comes out easily
Now remove the stalks. Remove 2 x plastic rivets underneath the steering cowling and 1 x plastic phillips screw on top.
Now remove 4 x Torx screws in each corner of the stalk hub and remove the stalk assembly. Disconnect cabling.

The steering column trim (in the footwell) will also have to be disconnected from the dash but you don't need to remove
it or disconnect any of the lights or warning gong. 2 x Screws underneath, 1 x plastic rivet where it joins the centre console
and a rubber plug (Clutch Stop) behind the clutch pedal must all be removed. Then just let it rest on the floor.
Now for the glovebox. Very easy. Open glovebox. Locate 2 x Phillips screws facing you either side of the glovebox hanging supports,
1 underneath on the door-side at the very edge and finally 3 in a row facing you at the top edge. Once removed, pull toward you
whilst rotating down. Disconnect light and torch recharge cables.
Here is another pic to remind you to disconnect your battery though by now it's too late...

I removed the glovebox door from the actual casing as I was fitting some accessories in there but it all comes out as one unit.
To get the door lower for more space, prize the locking pins off the hanging straps.

Short Detour
If you are going to install iPod controllers or non-OEM telephony etc you'd put it here, in the white recesses behind the glovebox.
There is easy access to the radio and 12V / earth feeds also.
I installed my GromAudio iPod controller here and a Parrot Evolution Bluetooth kit with Steering wheel adapter. It's very good value
over OEM as it has superior sound quality (Award winning DSP) and is compatible with more handsets. The GromAudio also let's me
control ipOd from my steering wheel as if it were the CD-Changer. I like these two set-ups as I don't need to see either of them and
nobody knows the car has a juicy iPod in the glovebox.
Parrot Bluetooth and GromAudio iPod Interface

Fits like a Glove
Now the centre trim strips running along the dash. These hide the main bolts holding the dash onto the frame support behind.
Using a plastic spatula or trim tool, gently pry them off. Whatever you use, make sure it's blunt and won't scratch your trim.

For passenger side, start with the longest one. Pry the corner away from the dash. They are simply press fit into plastic studs.
Work your way down and pull off. Do the same all 3 pieces.
Now remove all screws and nuts behind these trims, including the screws holding the vents at either end of the dash and the
headlight switch panel. The radio is also held in this way, remove 2 x screws either side there and slide it out. The vents just
pop out so give them a tug. Disconnect all radio wiring and the headlight switch connector too.
Centre Trims.
Passenger Side
Drivers Side
Radio out.
Radio connector - slide handle up then pull plug off - isn't obvious the first time.

Now the passenger airbag. Just pry up the air bag cover, it's only held in by thing tabs and ridges. Just use your hands or a
plastic spatula etc. Inside is the airbag. In theory you can leave this in place as it's not attached to the dash but the cover needs
to come away from the dash it is attached to a bracket underneath the airbag so remove the large nuts either side of the airbag,
lift it out (disconnect if you want) and then remove the airbag cover canvas straps.

Handbrake console also needs to come off but not totally - you only need access to remove the gearshift surround. So pry off
the gearshift gaiter. And unscrew 4 x screws in each corner.

I was replacing my surround trim at the same time - this is generally a good time to sort any electrical / trim issues you have
as it's all coming off.
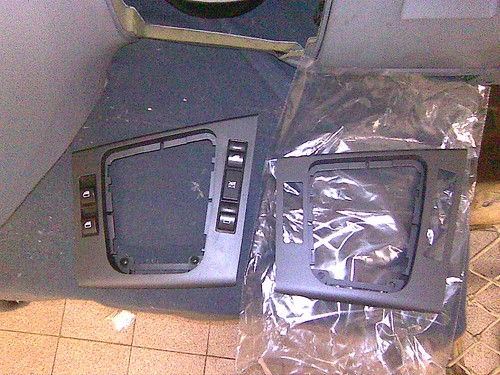
Now remove the 2 x screws holding the ashtray bracket in. There will also be 2 cables for cigarette lighter and ASC/DSC switch.
Just comes right out.
I've left the center vents and A/C bracket for last as it's the the only bit that will trip you up if you haven't done it before.
The Climate unit just pops out - get your hand behind it and push it toward you. Disconnect the cables.
Now, looking at the centre vents straight on, there are two click tabs you cannot see that must be pushed up at the front base
of the vents. Then you just reach behind it and push it out. Ensure you have heard the click release of those tabs otherwise
it won't budge. If you're sure, give it a good push - it will come - don't pull it from the vent slats - they'll break. When it comes
out there is an actuator cable attached for the cold/warm mixer. Disconnect this and remove the locking tab. Do not lose it.
Press upwards inside here (on the vent base not the dash) till you hear the click
Also, remove the radio / climate housing bracket now also.
Now remove the A-pillar trim. Very easy. If you don't have airbags here just grab them and pull them up and out. If you have
airbags here it's the same except you pry off the centre strip facing the windscreen and remove 3 x Torx screws. They are long
so choose your tool well - not much space against the glass.
All the stuff out.

Once these are out you can remove the dash. Helps to have 2 people here but you can do one end at a time.
Stripped and ready for removal.
Don't forget to unplug this connector before you take the dash out - even more importantly, don't forget to plug it in FIRST
when replacing.

And it's off!
And the bit I've been waiting all day to say - installation is reverse of removal!
Old dash and new dash.

When installing, if screws don't fit smoothly or trim is misaligned or the glovebox doesn't close properly it means the dash is not 100%
aligned so check that it is before you put it all back together. You may also get weak air flow from your vents if it's not set properly.


