

My first DIY. I couldn't find any place with pictures on how to remove the front convertible top to get to the windshield locks and motor.
Back story: Just got my storage lid motor repaired at the stealership. While that happened, the mechanic told me the windshield lock's plastic housing was on the verge of breaking (showed me a picture). Quoted me another $1,500 to fix that. Decided I'd figure out how myself. So here is my DIY.
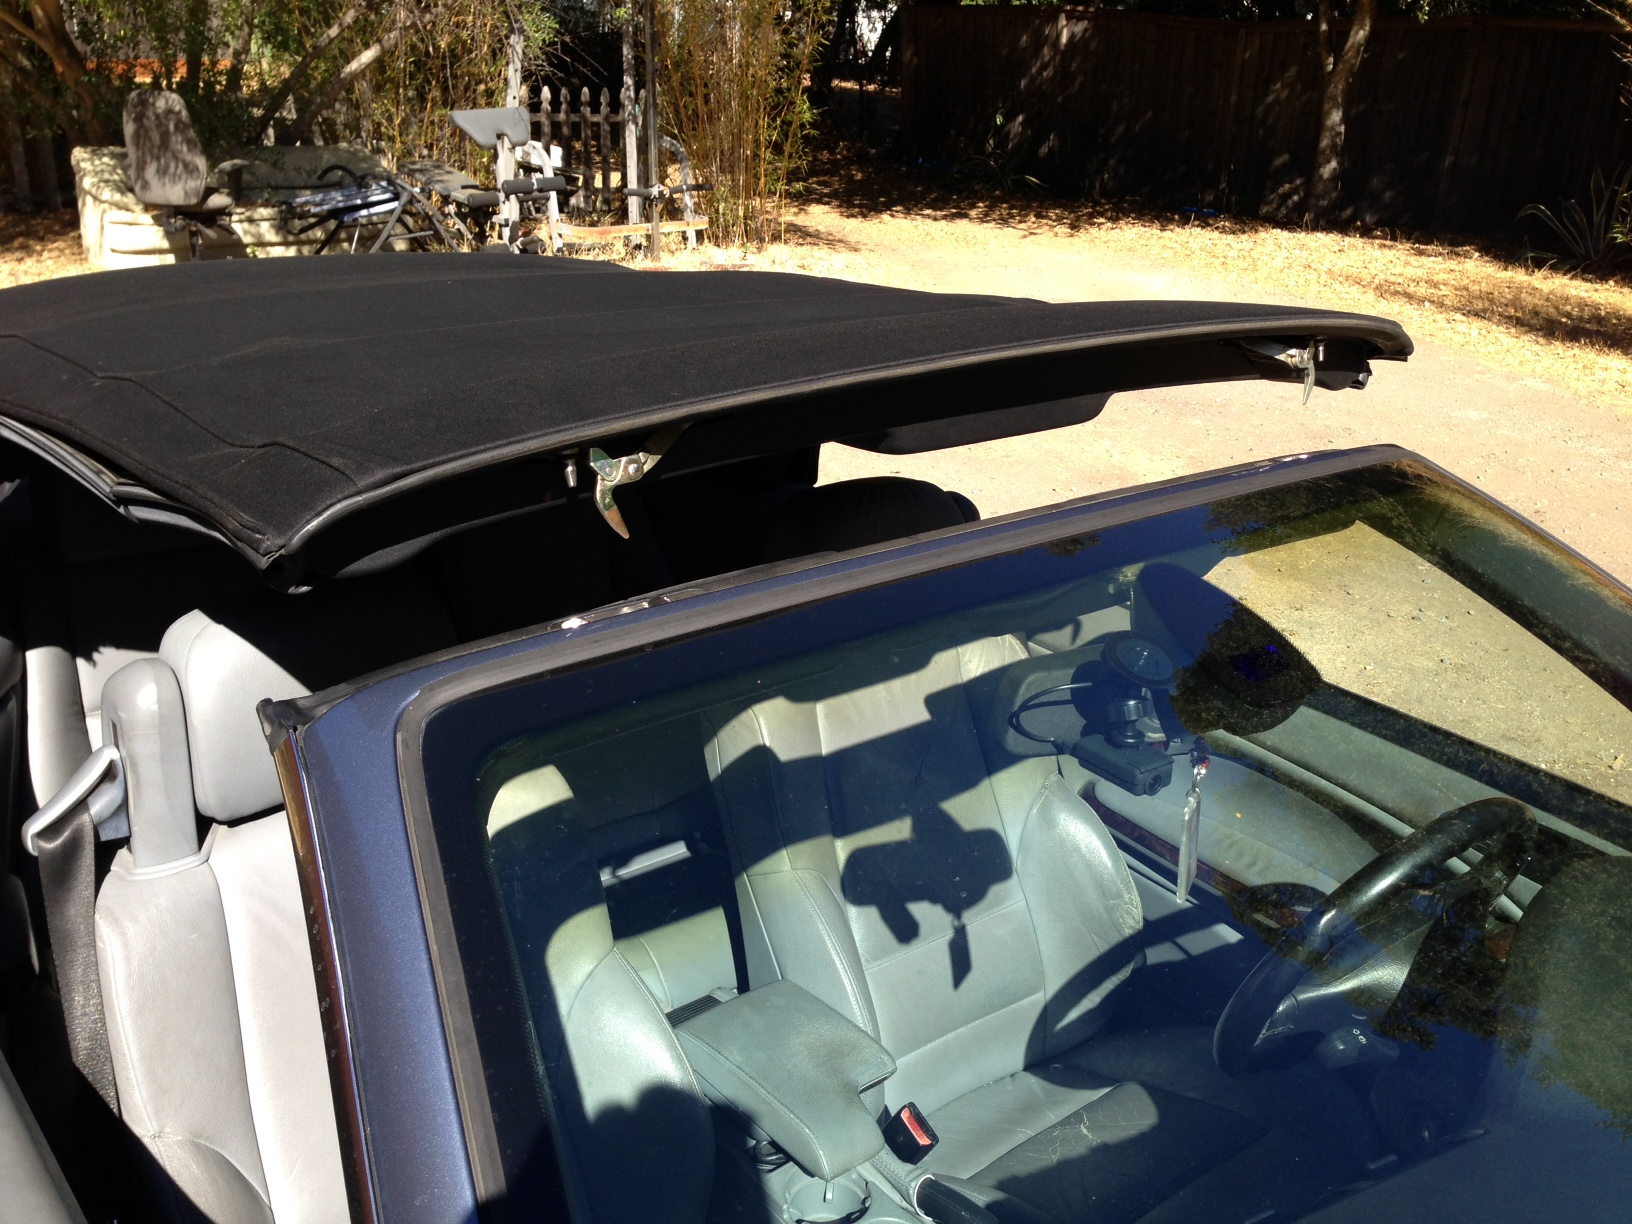
Step 1:
Allow the top to open just a bit, then shut off the car until it looks like this.
![Image]()
Step 2:
On the bottom of that lip, there are about 9 torx screws. Take all those out. On either end of the lip, there are also 2 caps. Pull those off and remove the 2 nuts.
Bolts under the 2 caps.
![Image]()
Also pull out this waterproofing rubber
![Image]()
Step 3:
Get back inside the car. Both corners have 2 screws that need to come out.
![Image]()
![Image]()
Step 4 (Optional depending):
In my case, the bottom cloth of the hood was screwed on too tightly (normally it looks like you can just pull down on the plastic motor and lock cover from this point). Mine was too tight, so I had to unscrew it all along the lip from the inside. You have to literally reach your hand inside the interior cloth to reach the screws.
First screw behind where my finger is touching
![Image]()
Keep pulling down as you continue at screws
![Image]()
Step 5:
Pull off the plastic housing. It's a PITA. I had to pull hard and use a screw driver to pry at many parts.
Step 6:
Do as you wish to the parts. You can replace them, or do what I did in step 7.
My windshield lock
![Image]()
The cracks on the plastic. Once that fails, the locks don't work.
![Image]()
Step 7:
I used metal epoxy putty to strengthen all the cracks. Stuffed it into the cracks and around it. No idea how long it will hold. Hopefully for a long time because that putty sets hard as rock.
![Image]()
Step 8:
Sleep! It took my 4 hours to do this because I was doing trial and error along the way (no DIY read for me). I put a lot of blood, sweat and a few tears into this. Have bandaids standing by. It's also a lot easier putting it back together with 2 people. Hope this helps people for a long time to come.
I'm still laughing at myself for letting the dealer charge me $1,000 to fix the motor under the rear seat. Something I could have done in 30 minutes. Then I went and did this myself.
Back story: Just got my storage lid motor repaired at the stealership. While that happened, the mechanic told me the windshield lock's plastic housing was on the verge of breaking (showed me a picture). Quoted me another $1,500 to fix that. Decided I'd figure out how myself. So here is my DIY.
Step 1:
Allow the top to open just a bit, then shut off the car until it looks like this.
Step 2:
On the bottom of that lip, there are about 9 torx screws. Take all those out. On either end of the lip, there are also 2 caps. Pull those off and remove the 2 nuts.
Bolts under the 2 caps.

Also pull out this waterproofing rubber

Step 3:
Get back inside the car. Both corners have 2 screws that need to come out.


Step 4 (Optional depending):
In my case, the bottom cloth of the hood was screwed on too tightly (normally it looks like you can just pull down on the plastic motor and lock cover from this point). Mine was too tight, so I had to unscrew it all along the lip from the inside. You have to literally reach your hand inside the interior cloth to reach the screws.
First screw behind where my finger is touching

Keep pulling down as you continue at screws

Step 5:
Pull off the plastic housing. It's a PITA. I had to pull hard and use a screw driver to pry at many parts.
Step 6:
Do as you wish to the parts. You can replace them, or do what I did in step 7.
My windshield lock

The cracks on the plastic. Once that fails, the locks don't work.

Step 7:
I used metal epoxy putty to strengthen all the cracks. Stuffed it into the cracks and around it. No idea how long it will hold. Hopefully for a long time because that putty sets hard as rock.

Step 8:
Sleep! It took my 4 hours to do this because I was doing trial and error along the way (no DIY read for me). I put a lot of blood, sweat and a few tears into this. Have bandaids standing by. It's also a lot easier putting it back together with 2 people. Hope this helps people for a long time to come.
I'm still laughing at myself for letting the dealer charge me $1,000 to fix the motor under the rear seat. Something I could have done in 30 minutes. Then I went and did this myself.


